Embarking on the journey of trail running as a beginner is an exhilarating experience. There's a unique joy in connecting with nature, navigating varied terrain, and pushing your physical limits amidst breathtaking scenery. However, this exciting new world often comes with its own set of challenges, and for many newcomers, one of the most persistent and frustrating adversaries is the humble blister.
- •The Unavoidable Truth: Dealing with Blisters on Trail Runs Beginners
- •Proactive Measures: Preventing Blisters Before They Start
- ◦The Right Socks: A Beginner's First Line of Defense
- ◦Shoe Fit: More Crucial Than You Think for New Trail Runners
- ◦Taping and Lubrication: Pre-emptive Strikes Against Friction
- •First Aid on the Trail: What to Do When a Blister Appears
- ◦Stopping and Assessing: The First Critical Step
- ◦Popping vs. Not Popping: A Critical Decision
- ◦Protecting the Area: Bandaging and Cushioning
- •Post-Run Care and Recovery for Blisters
- •Long-Term Strategies for Blister-Free Trail Running
- ◦Breaking in Shoes and Toughening Feet
- ◦Hydration and Nutrition: An Indirect Influence
- ◦Regular Foot Checks and Maintenance
- ◦When to Seek Professional Help
- ◦FAQ: Common Questions for Beginners on Blisters
- ▪What should I always carry in my pack for dealing with blisters on trail runs beginners?
- ▪Can I run again if I have a blister?
- ▪How can I tell if my trail shoes are causing my blisters?
- ▪Are there specific lacing techniques that help prevent blisters?
- ▪Should I use foot powder to keep my feet dry?
These small, fluid-filled pockets of skin can quickly turn a glorious run into a painful hobble, forcing you to cut short your adventure or even sideline you for days. Understanding how to manage them is not just about comfort; it's about staying consistent with your training and truly enjoying the process.
It’s a rite of passage for almost every new trail runner to encounter their first blister, often many more than just one. The combination of uneven ground, increased friction from foot movement within shoes, and the inevitable sweat and moisture creates a perfect storm for skin irritation.
But don't despair, because while they might seem inevitable, blisters are largely preventable and, when they do appear, entirely manageable. This article is dedicated to providing practical, real-world advice on dealing with blisters on trail runs beginners, offering insights that go beyond simple band-aid solutions to foster a deeper understanding of foot care on the trails.
The goal here isn't just to patch things up after the fact, but to equip you with the knowledge to identify potential problems early, take preventative measures, and confidently tackle any blister situation that arises. We’ll explore everything from choosing the right gear to on-the-spot fixes and post-run recovery, all tailored specifically for those just starting their trail running adventure. This isn't about quick fixes; it's about building sustainable habits that will keep your feet happy and healthy for countless miles to come.
The Unavoidable Truth: Dealing with Blisters on Trail Runs Beginners
For many embarking on their first few trail runs, the emergence of a blister can feel like a personal failing or an insurmountable obstacle. It's not. Blisters are an incredibly common issue, particularly when you're new to the sport and your feet are still adapting to the unique stresses of trail running. The varied terrain, with its ascents, descents, and lateral movements, causes your feet to shift and rub against your socks and shoes in ways that road running simply doesn't. Add to that the increased likelihood of moisture from sweat, stream crossings, or unexpected rain, and you have a recipe for friction-induced skin damage.
The key to effective blister management as a beginner isn't about never getting one – that's an unrealistic expectation for most. Instead, it's about understanding why they form, how to spot the early warning signs, and what actions to take both before, during, and after your run. This holistic approach transforms blisters from a debilitating problem into a manageable part of the learning curve. It's about developing a keen awareness of your feet, listening to their signals, and having the right tools and knowledge at your disposal. This foundational understanding is crucial for any beginner hoping to make trail running a lasting passion rather than a fleeting, painful experiment.
Identifying "Hot Spots" Early When Dealing with Blisters on Trail Runs Beginners
One of the most valuable skills a beginner trail runner can develop is the ability to recognize a "hot spot" – that specific area on your foot where friction is beginning to cause irritation, but before a full-blown blister has formed. This is your prime window of opportunity to intervene and prevent the situation from escalating. A hot spot typically feels like a localized burning sensation, a slight tenderness, or persistent rubbing in one particular area. It might not be painful enough to stop you in your tracks, but it's distinct enough to register as something "off."
Ignoring a hot spot is perhaps the biggest mistake a beginner can make. The temptation to push through, hoping it will just "go away," is strong, especially when you're enjoying your run or nearing the end of a planned distance. However, a hot spot is your foot's gentle warning system. If you heed it, you can often prevent a blister entirely. This means stopping, taking off your shoe and sock, and inspecting the area. It might be a creased sock, a bit of debris, or just a spot that needs immediate protection. Learning to check in with your feet regularly, especially on longer runs or when trying new gear, will save you a lot of discomfort down the line. This proactive self-assessment is a cornerstone of successfully dealing with blisters on trail runs beginners.
Proactive Measures: Preventing Blisters Before They Start
Prevention is always better than cure, especially when it comes to blisters on the trail. For beginners, establishing a robust preventative routine is paramount. This involves a combination of careful gear selection, intelligent foot preparation, and a willingness to experiment to find what works best for your unique feet. It’s not a one-size-fits-all solution, but rather a personalized approach built on fundamental principles.
The Right Socks: A Beginner's First Line of Defense
Perhaps the single most important piece of equipment for preventing blisters is your choice of socks. Forget cotton. Cotton absorbs moisture like a sponge, stays wet, and quickly becomes a friction-generating nightmare. For trail running, beginners should invest in socks made from synthetic materials like polyester, nylon, or acrylic, or natural fibers like merino wool. These materials excel at wicking moisture away from your skin, keeping your feet drier and significantly reducing the risk of friction.
Beyond material, consider the sock's construction. Look for seamless designs to eliminate potential rub points. Many trail running socks also feature targeted cushioning in high-impact areas and anatomical fits (left and right specific) for a snug, non-bunching fit. Some runners even swear by toe socks, which prevent friction between individual toes. Experiment with different brands, materials, and thicknesses to find what feels best for your feet and complements your shoes. A good pair of socks is an inexpensive investment that pays dividends in comfort and blister prevention.

Shoe Fit: More Crucial Than You Think for New Trail Runners
Your trail running shoes are the foundation of your foot health on the trails, and their fit is paramount. For beginners, getting the right fit can be tricky, as your feet might not be accustomed to the demands of varied terrain. A shoe that's too small will cramp your toes and cause rubbing. A shoe that's too big will allow your foot to slide around inside, leading to excessive friction, especially on descents where your toes might repeatedly hit the front of the shoe.
When trying on trail shoes, do so at the end of the day when your feet are slightly swollen. Wear the type of socks you'd typically run in. Ensure there's a thumb's width of space between your longest toe and the end of the shoe. Your heel should feel secure, with minimal slippage, but not constricted. Walk around, go up and down a ramp if possible, and pay attention to any pressure points. Don't assume a shoe will "break in" to fit better; a good fit should feel comfortable from the start. Your local specialty running store can be an invaluable resource here, as their staff are often trained to assess your foot shape and gait.
Taping and Lubrication: Pre-emptive Strikes Against Friction
Even with the best socks and perfectly fitting shoes, some individuals are simply more prone to blisters in certain areas, especially when they are new to the activity. This is where targeted foot preparation comes into play. Taping and lubrication are two effective strategies for creating a barrier against friction.
Taping: Athletic tape, medical tape, or specialized blister prevention tape can be applied to known hot spots before you even start your run. Common areas include the heels, arches, and specific toes. The key is to apply the tape smoothly, without wrinkles, and ensure it's secure. Some runners prefer moleskin for its cushioning, but it can sometimes lift and create its own friction points if not applied perfectly. Experiment with different types of tape to see what adheres best to your skin and stays put during activity. For instance, paper tape is gentle but less durable, while zinc oxide tape is robust but can be irritating to remove.
Lubrication: Anti-chafing balms, petroleum jelly, or specialized foot lubricants can be applied directly to areas prone to friction. These products create a slick surface that allows your skin to glide rather than rub, significantly reducing the shear forces that lead to blisters. Apply generously to areas like the balls of your feet, between toes, and the heels. Reapply as needed on longer runs, especially if you anticipate getting wet. This is a simple, yet highly effective, method for dealing with blisters on trail runs beginners, offering immediate relief and protection.
First Aid on the Trail: What to Do When a Blister Appears
Despite your best preventative efforts, blisters can still sometimes form. When they do, especially for beginners on a trail run, knowing how to react immediately can make a significant difference in preventing further damage and ensuring you can complete your run safely, or at least minimize discomfort.
Stopping and Assessing: The First Critical Step
The moment you feel a hot spot intensifying or suspect a blister is forming, stop immediately. Do not try to push through it. Continuing to run on a developing blister will only make it worse, potentially leading to a larger, deeper, and more painful injury. Find a safe spot on the trail, remove your shoe and sock, and carefully examine your foot.
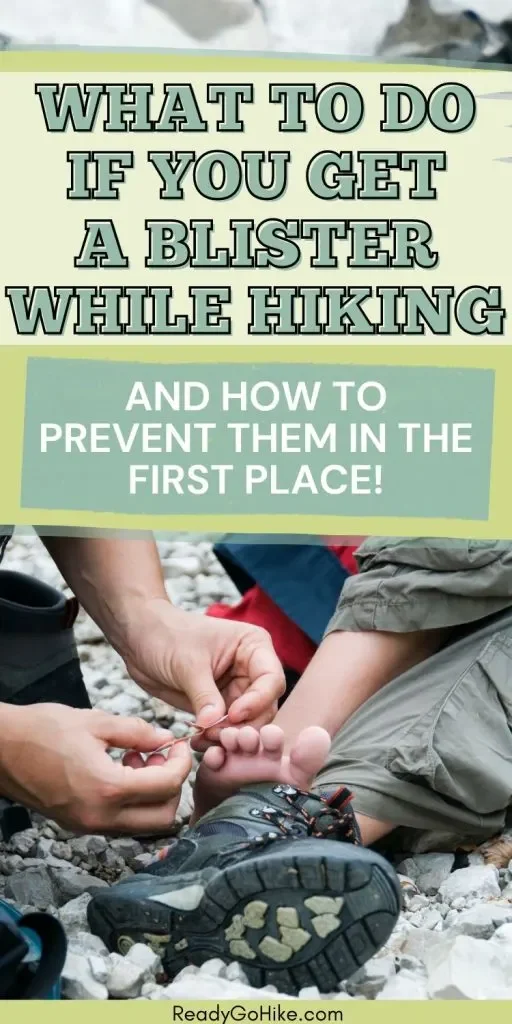
Look for any redness, tenderness, or a visible fluid-filled bubble. At this stage, it’s about identifying the problem and determining its severity. Is it just a hot spot? A small, intact blister? Or a larger, ruptured one? Your assessment will dictate your next steps. Always carry a small blister kit in your pack, even for shorter runs. This kit should include items like athletic tape, moleskin or hydrocolloid patches, antiseptic wipes, and a small pair of sterile scissors or a needle (though using a needle on the trail is generally a last resort).
Popping vs. Not Popping: A Critical Decision
This is perhaps the most debated aspect of blister treatment, and for beginners, it can be confusing. Generally, the advice is: do not pop an intact blister unless it is causing significant pain or is in a high-pressure area that makes walking or running impossible.
- If the blister is small and not causing much pain: Leave it intact. The skin over the fluid provides a sterile, protective barrier against infection. Clean the area, apply a protective covering like a hydrocolloid bandage (these are excellent as they cushion, absorb fluid, and promote healing), and try to continue carefully.
- If the blister is large, painful, or hindering movement: You might need to drain it. This should be done carefully and with sterile equipment to minimize the risk of infection.
- Wash your hands thoroughly.
- Clean the blister and surrounding skin with an antiseptic wipe or rubbing alcohol.
- Sterilize a needle (e.g., by holding it over a flame until red-hot, then letting it cool, or using an alcohol wipe).
- Carefully puncture the edge of the blister in 2-3 spots. Do not remove the top skin.
- Gently press the fluid out with a clean gauze pad or tissue.
- Apply an antiseptic ointment.
- Cover the drained blister with a sterile dressing, such as a hydrocolloid bandage or a combination of gauze and athletic tape. The goal is to keep the "roof" of the blister intact as a protective layer.
Remember, on the trail, sterility can be challenging. If you’re a beginner and unsure, err on the side of caution and try to protect the blister without popping it, then deal with it properly once you’re off the trail.

Protecting the Area: Bandaging and Cushioning
Whether you pop a blister or not, protecting the affected area is crucial. Hydrocolloid bandages (like Compeed or DuoDERM) are often the gold standard for blisters. They create a moist healing environment, cushion the area, and stay put for days. If you don't have one, moleskin or athletic tape can provide a good alternative. Cut the moleskin into a doughnut shape, placing the hole directly over the blister to relieve pressure, then cover the entire area with another piece of tape to secure it.
When applying tape, ensure it's smooth and without wrinkles, as wrinkles can create new friction points. Overlap pieces slightly if needed. The goal is to create a new, smooth, protective layer over the tender skin. If your sock or shoe feels like it's still rubbing, try adjusting the lacing or adding more padding. Sometimes, a simple sock change to a fresh, dry pair can also make a huge difference, especially if the original socks are damp and bunched up.
Post-Run Care and Recovery for Blisters
The work doesn't stop once you're off the trail. Proper post-run care is essential for ensuring your blisters heal quickly and without complications, allowing you to get back to your trail running adventures sooner rather than later. This is particularly important for beginners who might be eager to maintain their new routine.
Keeping it Clean: Preventing Infection
Once you're home, thoroughly clean the blistered area with mild soap and water. If you drained the blister on the trail, or if it has ruptured on its own, it's even more critical to keep the wound clean to prevent infection. Gently pat it dry. Apply a fresh antiseptic ointment and cover it with a sterile dressing. Change the dressing daily, or more frequently if it becomes wet or dirty, and continue to monitor for signs of infection such as increased redness, swelling, pus, or fever.
Allowing the blister to air out when you're at home and not active can also be beneficial, as long as it's clean and protected from further irritation. Just be mindful of keeping it clean and covered when you're wearing shoes or socks.
Promoting Healing and Comfort
For intact blisters, the best approach is often to leave them alone, protected by a hydrocolloid bandage. These bandages can stay on for several days, creating an optimal healing environment. They absorb fluid, cushion the area, and act like a second skin. When the bandage starts to peel at the edges, or after a few days, you can gently remove it and assess the healing.
For ruptured or drained blisters, continue to keep them clean and covered. The skin that formed the "roof" of the blister should be left in place as long as possible, as it provides the best natural protection. If it starts to peel off, you can carefully trim away loose edges with sterile scissors. Once the underlying skin has toughened up, you can gradually expose it to air. Resting the foot is also crucial. While it might be frustrating, taking a day or two off from running can significantly speed up recovery.
Long-Term Strategies for Blister-Free Trail Running
Beyond immediate treatment, developing long-term strategies is what truly prevents recurring blisters, helping beginners transition into seasoned trail runners with happy feet. This involves a continuous process of learning, adapting, and refining your approach to foot care.
Breaking in Shoes and Toughening Feet
Never wear brand new shoes on a long trail run. Always break them in gradually with shorter runs on less challenging terrain. This allows the shoes to mold to your feet and your feet to adapt to the shoes. Similarly, your feet themselves need to toughen up. Over time, as you increase your mileage and frequency, the skin on your feet will naturally become more resilient. This isn't about ignoring pain, but about allowing your body to adapt to the stresses of regular activity.
Some runners also advocate for foot-toughening creams or regular foot soaks in Epsom salts, though scientific evidence for these is mixed. The most effective way to toughen your feet is simply to run consistently and allow them to adapt naturally, while always paying attention to hot spots.

Hydration and Nutrition: An Indirect Influence
While not directly about friction, overall body health, including hydration and nutrition, plays a subtle but important role in skin integrity and healing. Dehydration can affect skin elasticity, and poor nutrition can slow down recovery. Ensuring you're well-hydrated before, during, and after your runs, and maintaining a balanced diet, supports your body's ability to repair and maintain healthy skin, indirectly aiding in dealing with blisters on trail runs beginners.
Regular Foot Checks and Maintenance
Make it a habit to inspect your feet regularly, not just after a run but also before. Look for any signs of dryness, cracks, calluses, or tender spots. Address these issues proactively. Keep your toenails trimmed short to prevent them from pressing against your shoes or adjacent toes. If you have persistent calluses, a pumice stone can help keep them from becoming too thick, which can sometimes lead to blisters forming underneath the hardened skin.
When to Seek Professional Help
While most blisters can be managed with self-care, there are times when professional medical attention is warranted. If a blister becomes severely infected (characterized by increasing redness, warmth, swelling, pus, or red streaks extending from the blister), or if it's extremely large and painful, or if you have underlying conditions like diabetes that affect foot health and healing, it's crucial to consult a doctor or podiatrist. They can properly drain the blister, prescribe antibiotics if necessary, and offer specialized advice for complex cases. Do not hesitate to seek help if you are concerned, as unchecked infections can lead to more serious complications.
Ultimately, dealing with blisters on trail runs beginners is a journey of learning and adaptation. It involves understanding your body, selecting the right gear, and developing a keen sense of awareness for your feet. With patience and the right strategies, blisters will become a minor inconvenience rather than a significant barrier to enjoying the trails.
FAQ: Common Questions for Beginners on Blisters
What should I always carry in my pack for dealing with blisters on trail runs beginners?
You should always carry a small blister kit. This typically includes antiseptic wipes, a few hydrocolloid bandages (like Compeed), athletic tape, and perhaps a small tube of anti-chafing balm or petroleum jelly. Some runners also include a small, sterile needle for draining, but this should be used with extreme caution.
Can I run again if I have a blister?
It depends on the blister. If it's small, intact, and well-protected with a hydrocolloid bandage, you might be able to continue running with minimal discomfort. However, if it's large, painful, ruptured, or showing signs of infection, it's generally best to rest until it has healed sufficiently. Pushing through a painful blister can worsen the injury and delay recovery.
How can I tell if my trail shoes are causing my blisters?
Pay attention to the location of your blisters. If they consistently appear in the same spot, especially after trying new shoes or increasing mileage in existing ones, it's a strong indicator of a shoe-fit issue. Blisters on the toes or front of the foot often suggest shoes are too small or not laced correctly, allowing the foot to slide forward. Blisters on the heel can indicate too much heel slippage or a shoe that's too wide. Visiting a specialty running store for a professional fitting can help diagnose and resolve these issues.
Are there specific lacing techniques that help prevent blisters?
Yes, different lacing techniques can help alleviate pressure points and secure your foot better, thereby reducing friction. For example, skipping an eyelet can relieve pressure on the top of your foot, while a "heel lock" lacing technique can prevent heel slippage. Experiment with different patterns to see what works best for your foot shape and blister-prone areas.
Should I use foot powder to keep my feet dry?
Foot powder can be helpful for some beginners, especially those with very sweaty feet. It can absorb moisture and reduce friction. However, it's not a substitute for good moisture-wicking socks. If powder clumps up or gets wet, it can sometimes create its own friction points. Use it sparingly and ensure your feet are clean and dry before application.
Ultimately, the journey of trail running, especially for beginners, is one of constant learning and adaptation. Blisters, while inconvenient, are often just another part of that learning process. By understanding their causes, taking proactive steps for prevention, and knowing how to respond effectively when they do appear, you can minimize their impact and ensure your focus remains on the joy and challenge of the trails. It's about developing a mindful relationship with your feet, equipping yourself with the right knowledge and tools, and building resilience one step at a time. Don't let a few bumps in the road — or on your feet — deter you from embracing the incredible world of trail running. Your feet will thank you for the care, and you'll be free to explore further and with greater confidence.